
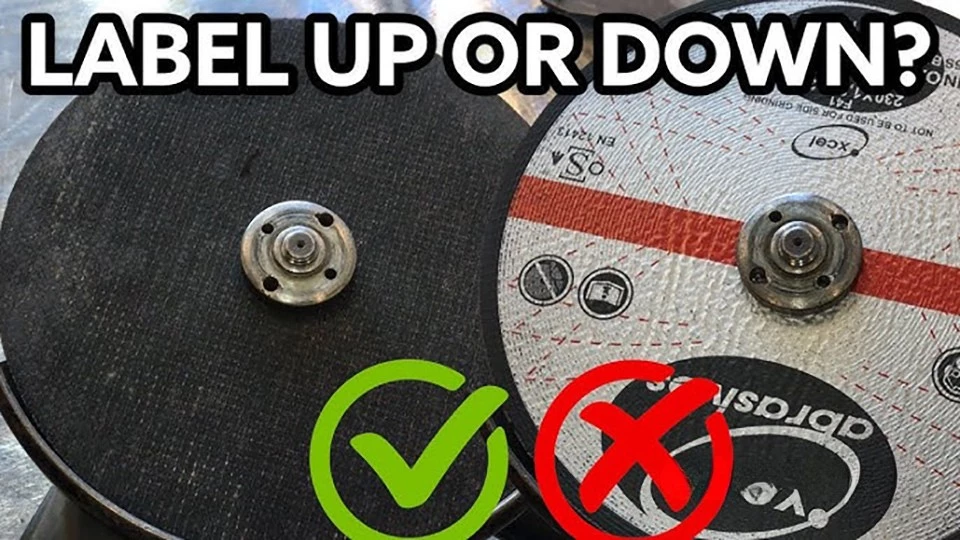
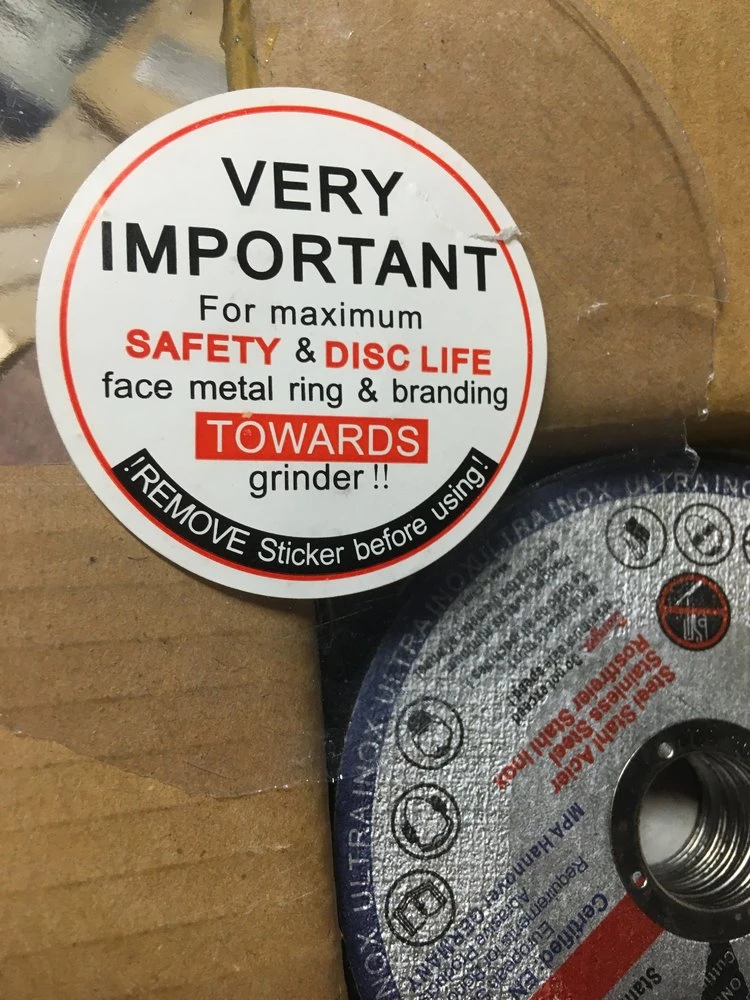
يتم تركيب قرص القطع بحيث يكون وجه الملصق متجهًا للخارج والجانب الذي يحتوي على الحلقة المعدنية أو المحور متجهًا للداخل نحو المطحنة. هذا الإعداد يتوافق مع تصميم القرص لضمان الثبات والأمان، ويجب دائمًا مطابقة أي سهم اتجاهي على القرص مع اتجاه دوران المطحنة—عادةً في اتجاه عقارب الساعة عند النظر من المقبض.
أعلم أن إتقان هذا الأمر يمنع فشل القرص والإصابات في ورشة العمل المزدحمة. في هذا المقال، ستتعلم طرقًا مثبتة للتركيب والسلامة والمزيد.
فهم أنواع أقراص القطع
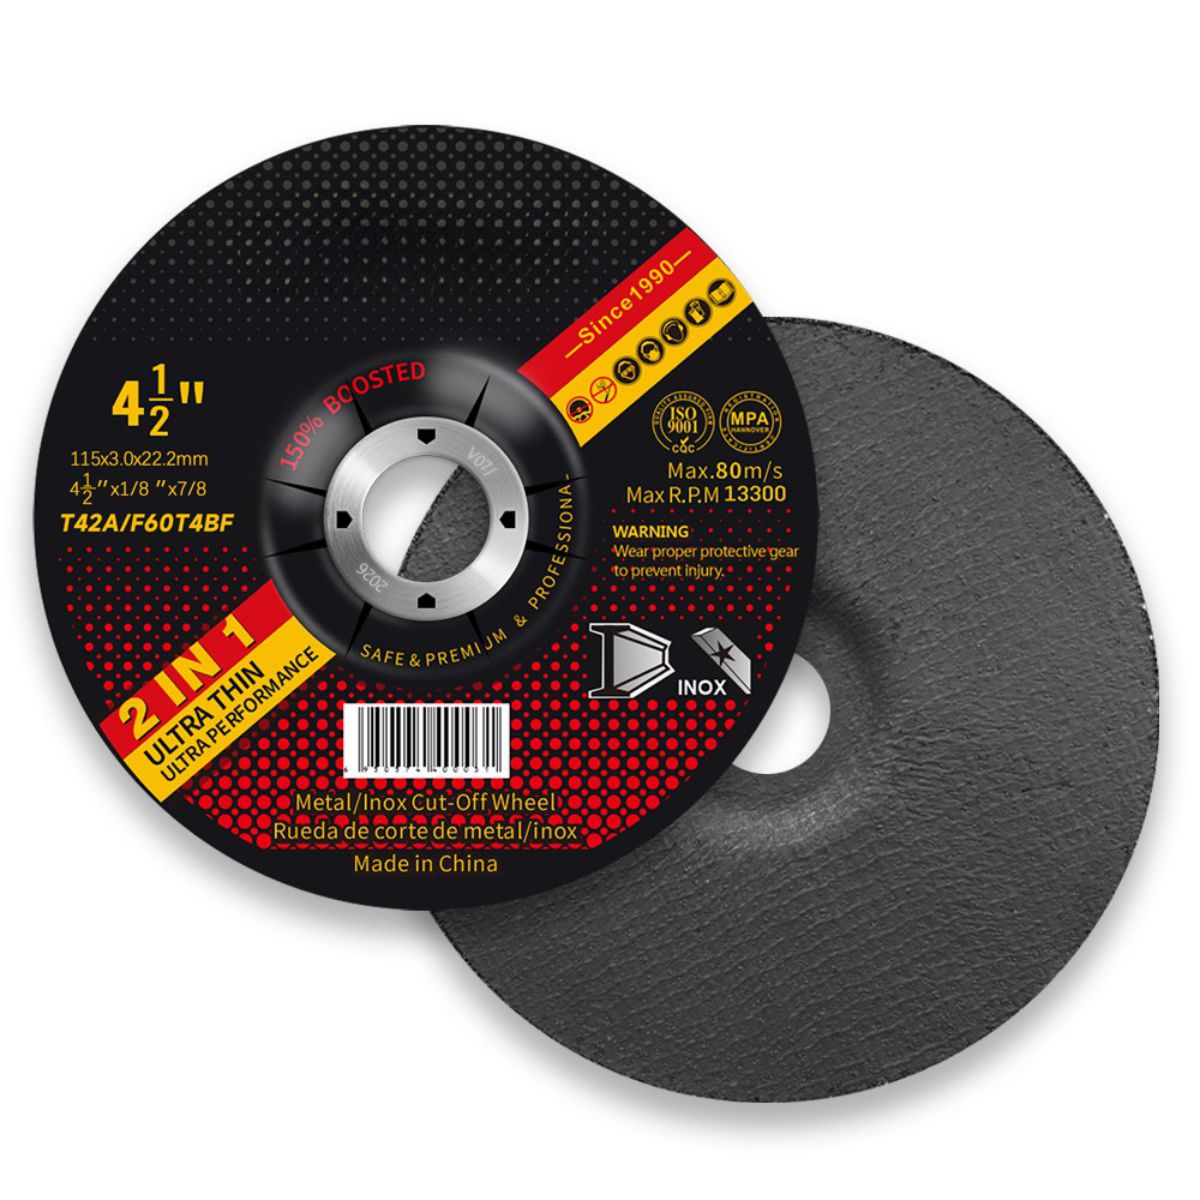
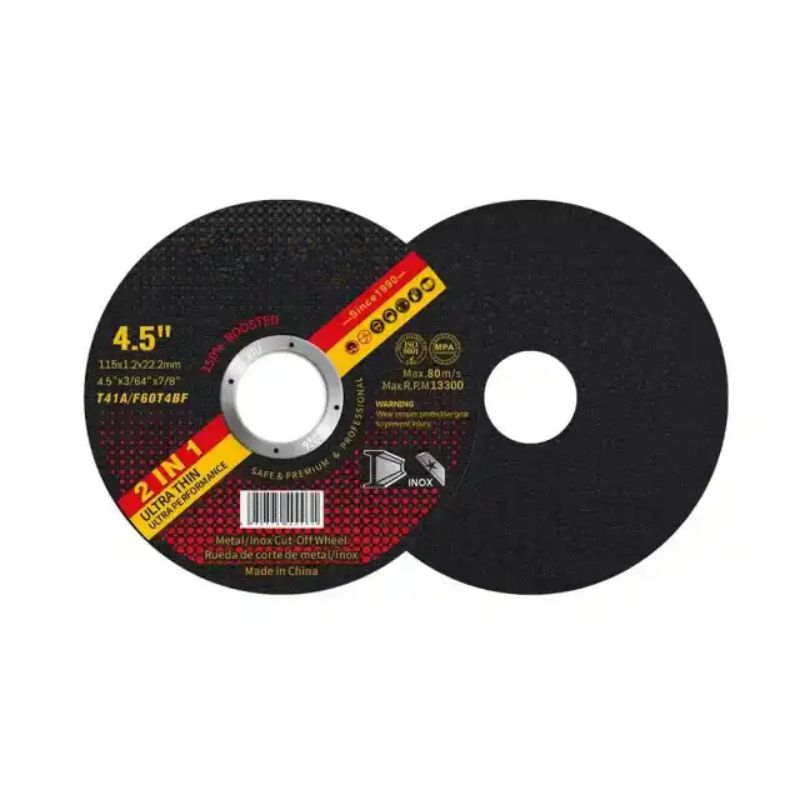
تختلف أقراص القطع حسب المادة والغرض، مما يؤثر على طريقة تركيبها. أقراص قطع المعادن هي عجلات كاشطة رفيعة للصلب أو الألومنيوم، وغالبًا ما تكون معززة بالألياف الزجاجية. قم بتركيبها بحيث يكون الملصق للخارج والمحور للداخل، للحصول على قطع نظيف دون انحشار.
شفرات الألماس مناسبة للخرسانة أو البلاط، بحواف مقسمة للتبريد. عادةً ما تحتوي هذه على أسهم واضحة؛ قم بمحاذاتها مع دوران المطحنة لتجنب التقطيع. أقراص الرفرف، رغم أنها أكثر للصنفرة، تُركب بطريقة مشابهة لكن مع توجيه الرفارف الكاشطة نحو العمل.
أقراص التجليخ أكثر سمكًا وذات نمط مركزي غائر، حيث يتناسب الصامولة مع التجويف. معرفة نوع القرص يضمن الاتجاه الصحيح من البداية. الأنواع غير المتطابقة تؤدي إلى أداء ضعيف، كما هو موضح في تقارير المستخدمين في منتديات اللحام.
لماذا الاتجاه مهم للسلامة والأداء
الاتجاه الصحيح للقرص يقلل من المخاطر مثل التفتت، الذي يمكن أن يرسل شظايا بسرعات عالية. التركيب العكسي يسبب تآكلًا غير متساوٍ، وارتفاع الحرارة، والارتداد، حيث يتحرك الجهاز بشكل خطير.
كما أنه يعزز الكفاءة: الجانب الكاشط يلامس المادة بشكل مثالي، مما يسرع القطع ويطيل عمر القرص. يلاحظ الخبراء أن الأقراص المعكوسة تقطع بشكل أبطأ وأخشى، مما يضيع الوقت في المهام. معايير السلامة من مصنعي المواد الكاشطة تؤكد على ذلك لمنع الحوادث في البيئات المهنية. ما أقدره هو كيف أن فحصًا بسيطًا يوفر عناءً لاحقًا.
الأدوات التي تحتاجها للتركيب الصحيح
Gather essentials before starting. A spanner wrench or the grinder’s included tool locks the spindle for nut removal. Gloves protect hands from sharp edges, and safety glasses shield eyes from debris.
For stubborn nuts, a cross-head screwdriver or adjustable wrench helps. Some grinders need adapters for disc sizes, like 5-inch cutting wheel. Keep a clean cloth handy to wipe the spindle. These basics make the process quick and secure, avoiding improvised fixes that damage parts.
Need to purchase high-quality cutting discs in bulk?
Step-by-Step Guide to Installing a Cutting Disc
Follow these steps for a flawless mount.
- First, unplug the grinder or remove the battery. Depress the spindle lock and loosen the outer nut counterclockwise—most threads are left-handed to self-tighten during use.
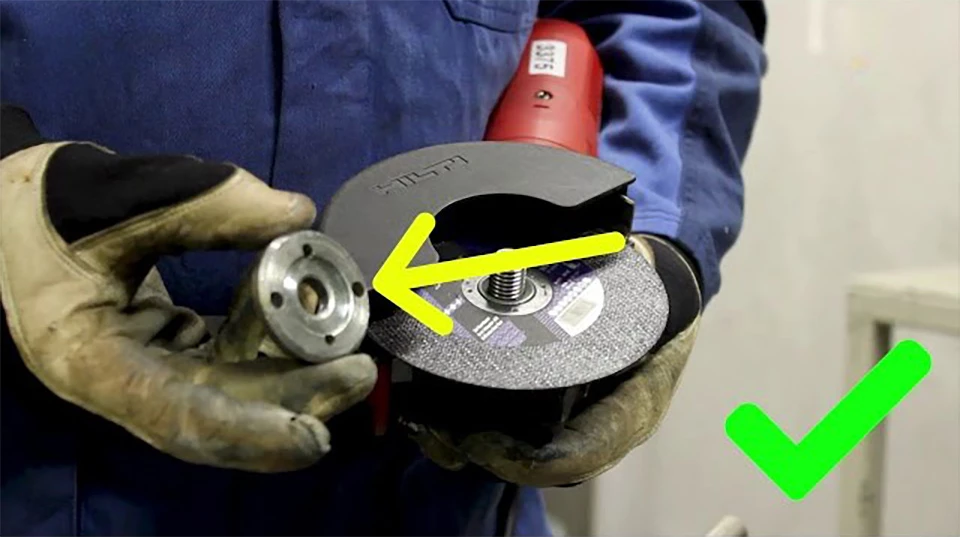
- Inspect the new disc for cracks or warps. Place it on the spindle with the label facing out, hub against the inner flange. Reattach the outer flange or nut, tightening clockwise just enough to secure without cracking the disc.
- Test spin the grinder unloaded for 30 seconds to check for wobbles. If smooth, you’re ready. This method works for most angle grinders, as confirmed by abrasive specialists.
Safety Precautions Before and During Use
Safety starts with inspection: ensure the disc’s RPM rating exceeds the grinder’s max speed. Wear full PPE—goggles, gloves, ear protection, and a dust mask for fine particles.
Position yourself so the disc spins away from your body, reducing fragment risk. Use the guard always; it deflects debris. Start cuts at a 15-30 degree angle to prevent binding. Ignoring these things can lead to hospital visits, so they should be considered as a priority each time.
Common Mistakes and How to Avoid Them
One frequent error is mounting backward, ignoring labels or arrows, which causes kickback. Avoid by double-checking markings before tightening.
Over-tightening the nut stresses the disc, risking cracks—use hand pressure plus a quarter turn. Using damaged discs invites failure; replace at first sign of wear. Neglecting the guard is another big no, as it exposes you to hazards. Simple habits like reading the manual prevent these pitfalls.
Troubleshooting Common Installation Issues
If the disc wobbles, recheck the nut tightness and flange alignment—debris on the spindle often causes it. Overheating during cuts signals a backward disc or wrong material match; flip it or switch types.
Poor cutting performance? Verify arrow direction matches the grinder’s spin. If the nut won’t loosen, apply penetrating oil and retry. These fixes keep your setup reliable, based on real user troubleshooting in tool communities.
Best Practices for Longevity and Performance
To maximize disc life, cut in straight lines with light pressure—let the tool do the work. Cool the disc between long sessions to prevent glazing.
Store discs flat in a dry area to avoid warping. Rotate stock to use older ones first. Match disc grit to the job: coarse for rough cuts, fine for precision. These practices extend usability and cut costs, as experienced users recommend.
Maintenance Tips for Your Grinder and Discs
Regular maintenance keeps everything running smoothly. Clean the grinder’s vents and spindle after use to remove buildup. Lubricate moving parts per the manual.
Inspect discs before storage for edge wear—replace if diameter shrinks below 50% original. Sharpen or dress grinding discs as needed. Annual checks on cords or batteries prevent failures. This routine builds trustworthiness in your tools.
I know that mastering disc installation transforms your grinding tasks from frustrating to efficient. Always consult your grinder’s manual for model-specific details.
FAQs
Can you use a smaller disc on a grinder?
نعم، إذا كان مناسبًا للعمود وتم ضبط الواقي بشكل صحيح. تعمل الأقراص الأصغر في المساحات الضيقة ولكن تأكد من تطابق تصنيف RPM لتجنب التحميل الزائد. هذا شائع في الأعمال التفصيلية، كما هو مذكور في أدلة السباكة.
ماذا لو لم يكن هناك سهم على القرص؟
اعتمد على قاعدة أن الجانب الذي يحمل الملصق يكون للخارج، مع توجيه المحور المقوى نحو الجلاخة. اختبر الدوران السلس؛ إذا تعثر، اقلبه. غالبًا ما تفتقر الأقراص الاقتصادية إلى الأسهم، لكن هذه الطريقة تثبت فعاليتها عمليًا.
كم مرة يجب أن أستبدل قرص القطع؟
استبدله عندما يتآكل إلى نصف الحجم، أو يتشقق، أو بعد الاستخدام المكثف الذي يُظهر تزجيجًا. الفحوصات البصرية قبل كل مهمة تكتشف المشكلات مبكرًا، مما يمنع الفشل أثناء القطع. يقترح الخبراء كل 10-20 ساعة من التشغيل، حسب المادة.
ما الفرق بين أقراص القطع وأقراص التجليخ؟
أقراص القطع رقيقة لتقطيع المواد، بينما أقراص التجليخ أكثر سمكًا لإزالة الأسطح والتشكيل. قم بتركيب أقراص التجليخ بحيث يكون التجويف الغائر لأسفل؛ فخلطها قد يؤدي إلى عدم الكفاءة أو الكسر.
هل يمكن استخدام قرص القطع مع الخشب؟
نعم، ولكن اختر أقراصًا مزودة برؤوس كربيد أو أقراصًا متخصصة للخشب لتجنب الاحتراق أو الارتداد. الأقراص المعدنية القياسية تتراكم عليها الراتنجات. قم بمحاذاة اتجاه تروس أداة الشحذ مع اتجاه دوران أداة الشحذ لضمان قطع آمن ونظيف.
هل من الآمن القطع بدون واقي؟
لا، لا تقم أبدًا بإزالة الواقي—فهو يحمي من انفجار الأقراص. اللوائح وخبراء السلامة يصرون على ذلك، حتى في المهام السريعة. الواقيات تحرف الشظايا، مما يحمي العيون والأطراف في أسوأ السيناريوهات.
 English
  العربية
  Español
  Polski
  Русский